Overview
As the number of devices at home keeps growing, so do the demands on the network, and improving its performance and stability becomes something worth thinking about.
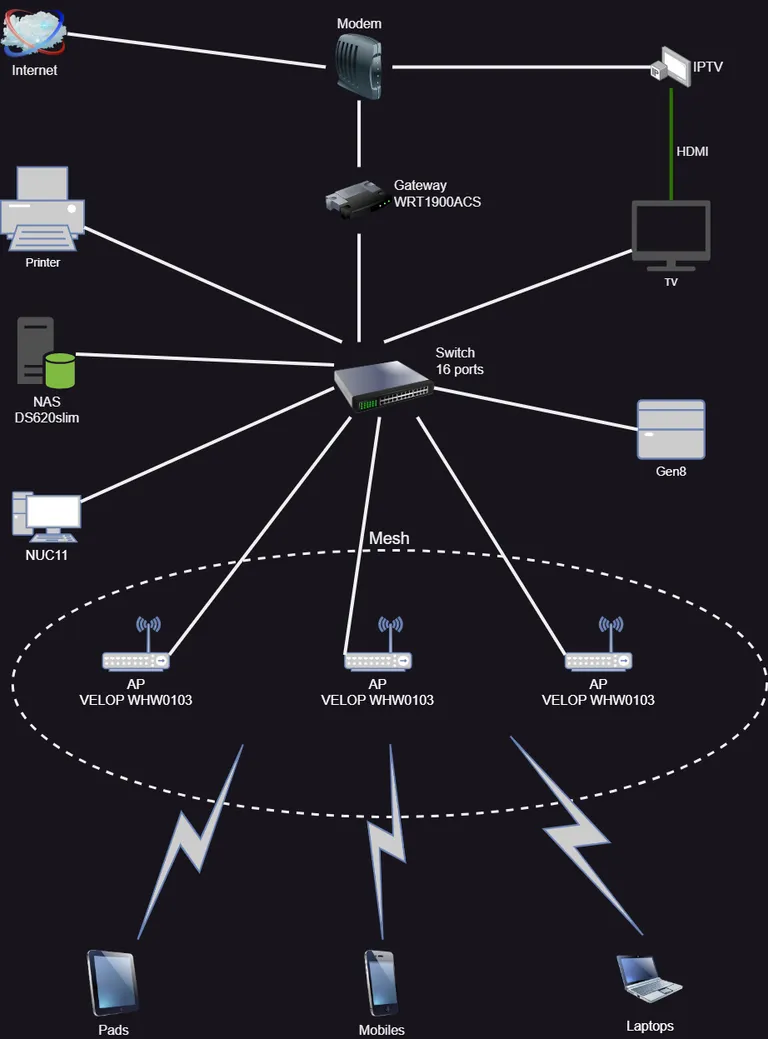
After a period of optimization, my home network topology currently looks like this. Since most home devices only support 1000 Mbps, for the sake of economy all the core network gear is gigabit.
Modem
There isn’t much to say about the modem: it’s the optical network terminal provided by the ISP, which converts the optical signal from the fiber into an Ethernet signal. My China Telecom plan gives 1000 Mbps down and 50 Mbps up. The one thing to note is that by default the ISP configures the modem to dial the connection itself in NAT mode. If you need to access your network from the internet, you can ask the ISP to switch it to bridge mode. Put simply, the difference between the two modes is whether the modem or the gateway (router) behind it dials the connection.
Even when the gateway dials, the ISP may assign a NATed private address to save public IPs. Normal browsing works fine, but you can’t reach your home gateway directly from the internet, and therefore can’t reach the devices inside your home network. If the IP address you get after dialing isn’t a public IP, you can ask the ISP to change it; different ISPs may have different policies.
Besides the port connected to the gateway, the modem has another port for IPTV, used to watch the live TV and on-demand content provided by China Telecom. Today’s smart TVs can usually install apps for on-demand video, so IPTV has become rather pointless.
Gateway
The gateway, also called the router, routes packets for the internal network and provides network services such as DHCP and DNS. It also acts as a firewall to protect devices on the internal network.
For the gateway I chose the Linksys WRT1900ACS.
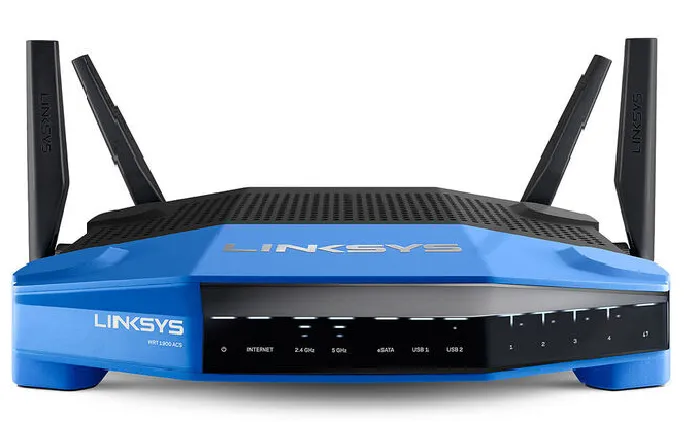
I picked Linksys mainly for its good support of the open-source OpenWrt firmware. Its dual-core 1.6 GHz CPU, 128 MB NAND and 512 MB RAM also give decent performance and room to grow. The router supports 802.11ac, but since it has to live in the wiring cabinet — and a single wireless router can’t cover every corner of the home anyway — I disabled its wireless after flashing OpenWrt and use it for wired networking only.
OpenWrt is fairly easy to configure, so I won’t go into detail here. Later posts will cover building network services on OpenWrt, such as a transparent proxy.
Switch
A router usually provides only one WAN port and four LAN ports, which isn’t enough when there are many wired devices, so a gigabit switch is needed. As the topology diagram above shows, even without drawing every device, an 8-port switch wasn’t enough. Based on the Ethernet cables pre-installed during renovation, I chose a 16-port managed switch.
For the switch I chose the Netgear GS116E.
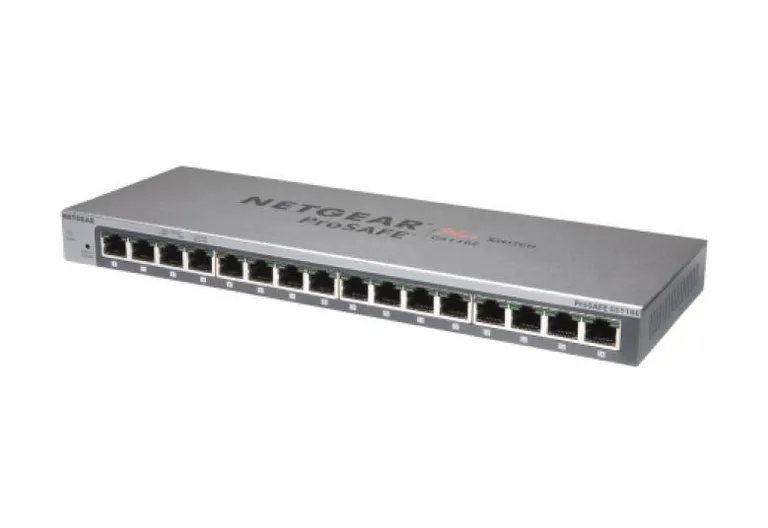
It’s a 16-port gigabit switch with VLAN and link aggregation support and an all-metal case that feels solid. Its only drawback is the lack of PoE, which rules out PoE wireless APs and PoE cameras — something to upgrade in the future.
With the switch in place, all the wired devices can be connected at once. Next comes the question of how to provide wireless.
Wi-Fi
There are no fewer wireless devices at home than wired ones: phones, tablets, laptops, IoT devices and more. In a home of around 100 square meters, a single wireless router just can’t provide good coverage. Although every manufacturer claims its router has wide coverage and strong wall penetration, signal strength drops sharply a little farther away or behind a wall, and devices then negotiate a lower data rate. With a weak signal, packet loss also rises significantly, and retransmissions add even more load to the router.
So adding more access points is the better approach. There are currently two mainstream ways to build a multi-AP network:
- AC + AP
- Wi-Fi Mesh
A good AC + AP setup usually has a dedicated access controller (AC) that handles wireless authentication and coordinates the APs. Compared with Wi-Fi Mesh it’s the more professional option, typically used in businesses and large public venues. For a home it’s expensive, and my wiring cabinet has no room for extra equipment, so I chose the option that’s more convenient for ordinary users.
For Wi-Fi APs I use the Linksys Velop AC3900.
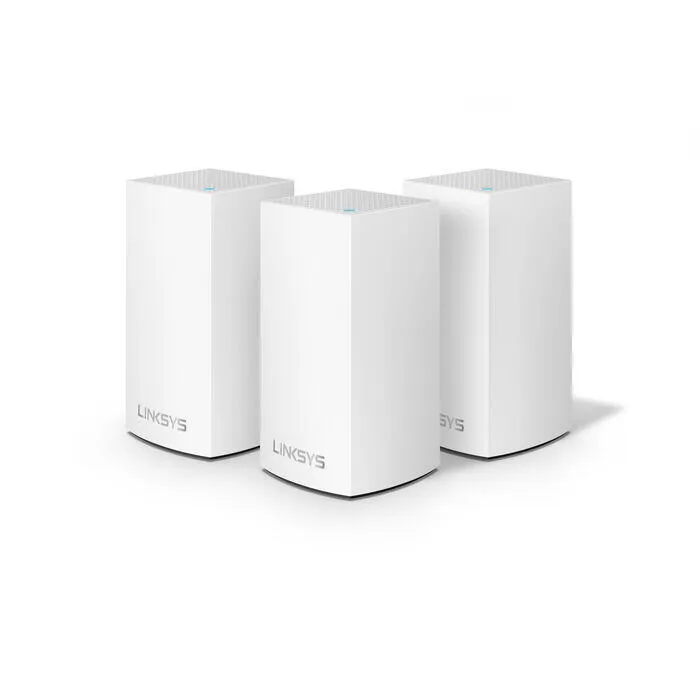
The Velop AC3900 consists of three identical AC1300 units. One acts as the primary node and the other two act as secondary nodes, automatically forming a Wi-Fi mesh network. Devices can roam between the three APs, and both wireless and wired backhaul are supported: with wireless backhaul only the primary node needs an Ethernet cable, and the secondary nodes exchange data with it over a dedicated wireless channel. I ran Ethernet to every room during renovation, so I use wired backhaul — every AP is cabled, which gives more reliable network quality. The AC1300’s maximum bandwidth is 867 Mbps (5 GHz) + 400 Mbps (2.4 GHz); on the 5 GHz band its theoretical speed approaches the maximum of a gigabit network. So in a gigabit environment this setup is the more cost-effective choice. Of course, multiple devices on the same AP share its bandwidth, so upgrading to Wi-Fi 6 would be better. In that case you could choose the Linksys AX5400, which can join the same mesh as the AC1300 units as needed.